How to make gifs for Tumblr on Linux / only using free software
This is quite a niche guide, but I also want somewhere to keep track of the settings I use and figured I might as well turn it into a guide while I'm here. Feel free to contact me (guides [@] cubes [.] link) about anything in this guide.
This guide assumes you already have a video to work from. Check out my piracy guide if you're looking for ways to obtain various kinds of video.
It will also assume that if you are a Linux user, you know how to download applications for the distro you are using. This might be an application store like Pop!_OS's Pop!_Shop, or using AppImages, or the flatpak store. mplayer can be installed using the terminal.
Tools
Kdenlive
Kdenlive is a free video editor, we'll be using it to cut the clip we want to use from a larger video. It's easy to download for both Windows and Linux, click here to go to it's download page.
mplayer
mplayer is a media player primarily for Linux, although it is also available on Windows. It is the tool we will use to extract frames from videos. It is possible to use VLC to obtain frames, however it has a tendency to duplicate frames randomly, and I don't like the quality of the result.
To download mplayer for Linux, open a terminal and run sudo apt install mplayer.
To download mplayer for Windows, click here. Scroll down until you see Build selection table, and in most cases the first item in the table will be suitable.
Note: in order to use mplayer on Windows, you will need to put your video file in the extracted mplayer folder and run commands from there. Once you have the frames, you can move them somewhere else. Otherwise, you can use the full path of mplayer each time you run the command. For example, if the mplayer.exe is in downloads you can run C:\Users\(username)\Downloads\mplayer\mplayer.exe instead of just mplayer, as Windows will not know where it is (in theory - your actual path will be different).
GIMP & Animstack
GIMP is a free image manipulation software. If you've ever looked for Photoshop alternatives, you will surely have heard of it. If you are a first time user, don't be put off by how different it is to Photoshop. While it objectively can do everything that PS can do, it often is achieved in a very different way, and it can take some getting used to operating. However, once you know how it's done you'll find it hard to turn back!
Click here to see GIMP's downloads page.
Note: if you want to add text or some other overlay to your gif, I strongly recommend also installing the AnimStack addon for GIMP. Click here for AnimStack download page, and click here for instructions on how to install GIMP addons.
1: Cutting clips
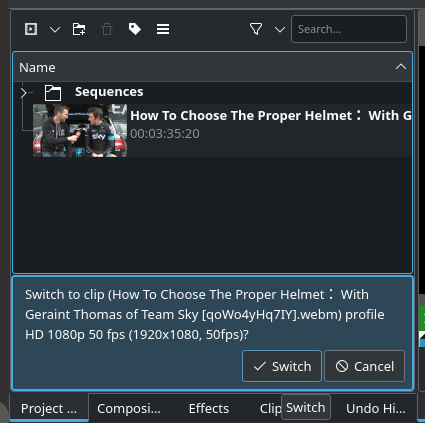
First of all, open Kdenlive. Drag your video into the project bin, or right click in the project bin and click Add clip or folder. Your video should show up like below! You should click Switch when prompted, though you may want to remember what fps it asks you if it can switch to. For example, here, it is telling me it will switch to 50fps. Then, drag your clip from the project bin, onto the timeline.
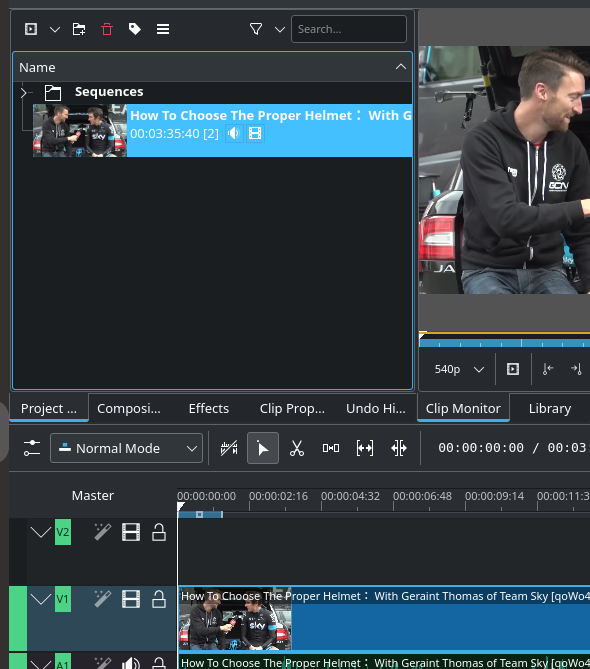
Now, you need to find the areas you want to clip! So first, put the timeline marker to the start of the clip you want to cut. You can click on the timeline to move the marker, and you can use the left and right arrow keys to nudge it in either direction for more precision. Once your marker is at the start of the clip you want, press Shift + R to split the video at that point. Then move the timeline marker to where you want the clip to end and press Shift + R again. Now, you'll have a clip!
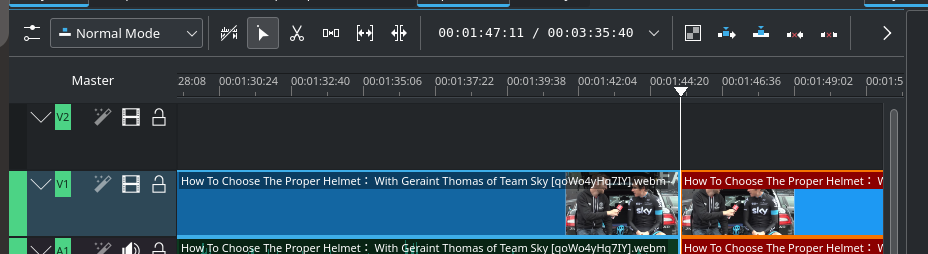

Select your clip, then right click on the timeline where the times are and click Adjust timeline to section.

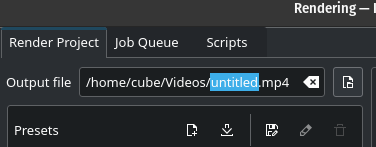
Then go to Project → Render..., set the clip name in Output File to whatever you want, check Selected Zone, then click Render to File.

2: Getting frames
Now you have a clip, it's time to get the frames from that clip.
If you're running Linux, go to the folder where your clip is, right click inside that folder, then select Open in terminal (or similar). You can also open a terminal and manually locate the directory using commands.
If you're running Windows, go to the folder where your clip is, shift + right click inside that folder, then select Open in PowerShell (or similar). You can also open PowerShell or command prompt and manually locate the directory using commands.
Now, type out the following command, replacing clip.mp4 with whatever you named your clip. Then, hit enter.
mplayer clip.mp4 -nosound -vo jpeg:quality=100:outdir=frames
Note for Windows users: you should replace the mplayer part with the full path to where you unzipped your mplayer download. Alternatively, if you run this command from within that folder it will also work as long as the clip is also there.
This command will create a new folder called frames, and populate it with every frame from the clip. It may take up to a minute or longer, depending on the length of your clip. Once it is done, you can open the folder and even prune off any frames from the beginning or end that you don't need; for example, if you captured a few seconds before you want the gif to start, or after it finishes. When you're happy with the frames, we can move on.
3: Import into GIMP
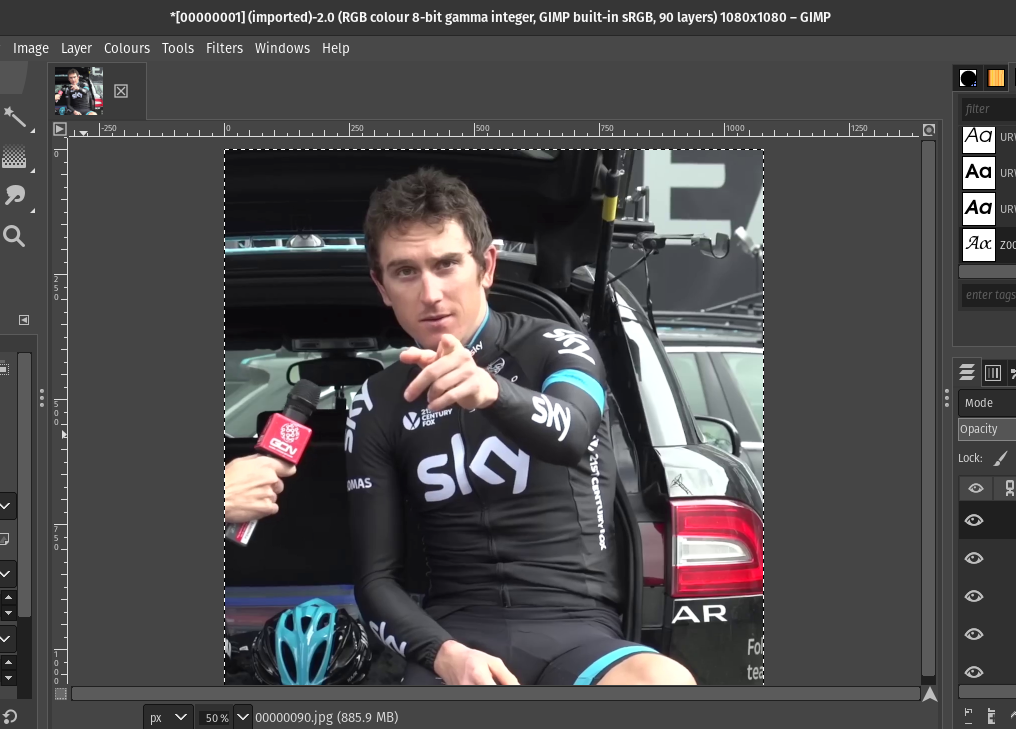
Open GIMP. Go to File → Open as layers… or, press Ctrl + Alt + O. Navigate to your clip's frames folder, then highlight them all (Ctrl + A is the easiest way) and click Open. This process will take a minute or two, as GIMP opens each frame as a layer, one at a time. If you have used Photoshop in the past, you will think "woah, this is slow, surely it can go faster??". No. It can't. I would so love it if it could.
Now, I like to make square gifs. These are really simple to make because they will slot in alongside other square gifs quite neatly. Landscape gifs look good for larger scenes, but you need to find the best aspect ratio to not make your gif look grainy, compressed, or blurry. For now, I will keep it simple and resize my gif to a square, but feel free to experiment with cropping. If you choose not to resize at all, you may find that your image is much too large for Tumblr.
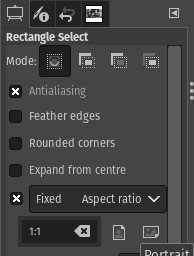
Below is where the Rectangle tool is found, as well as the settings to use to get a square selection.

If you are making a gifset, you will want all your gifs to be the same size. If you don't, Tumblr will auto-resize them for you, and some (the smaller ones) will look blurrier than others. I almost always crop from top to bottom, so that I know all of mine will be the same size.
You can use the left and right arrow keys to nudge your selection in either direction, but make sure it is nudging the selected area and not the frame. You can use Ctrl + Z to undo any mistakes like that. Once you've got the area you wish to crop by, go to Image → Crop to Selection.

There you go! Before you continue, you might want to make sure the area you've cropped by includes everything you want to include in your gif. So go to Filters → Animation → Playback… and the animation window will appear. Now, if you remember at the beginning what fps you were switched to, you can select it in the animation window here. It doesn't really matter if you forgot, this is merely for preview purposes anyway.
The settings I use for my preview are: One frame per layer (replace), 0.5x, 50fps
Play around with it until it looks like something decent; again, it is only for preview purposes so don't worry too much about it.
If you're happy with your preview, we can now scale it down, so that Tumblr actually allows us to upload it. Go to Image → Scale Image…. This stage depends on how big your source image is. I'm working with a 1080 x 1080px image (after cropping), and I will scale it by 50% so that I end up with a 540 x 540px image. I changed the first dropdown to percent, and then changed the width (or height) to 50. They should both change to the same thing, but just in case they don't, make sure both Height and Width say 50.00.
You can also just manually change the dimensions to 540 x 540 px, as long as that is smaller than what you started off with.

4: (optional) Add text
If you do not wish to add text, feel free to skip this section. If you do wish to add text, please be sure that you have installed AnimStack for GIMP.
Please note: I only know how to add an overlay (text) to every frame in the animation. AnimStack allows you to do very sophisticated things, such as only adding text to some frames, but you will have to do a deeper delve into AnimStack yourself to find out how.
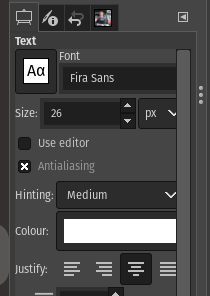
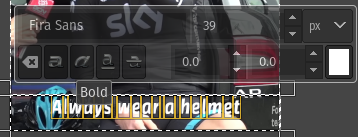
Now, adding text to an image is almost identical to Photoshop. Select the text tool, adjust your text settings, then click on the image. Here are the settings I like to use initially. I also like to apply Bold and Italic to the text after typing it. As you can see, I also increased the size to 39 for this gif. Play around with the settings, and be sure to highlight text you wish to change the style/size of.
Once you're happy with your text, we're going to add an outline and a shadow to it. If you attempt to edit the text after applying these, you will be warned that the filters will be removed, so make sure you're really happy with the text that you have before this step!
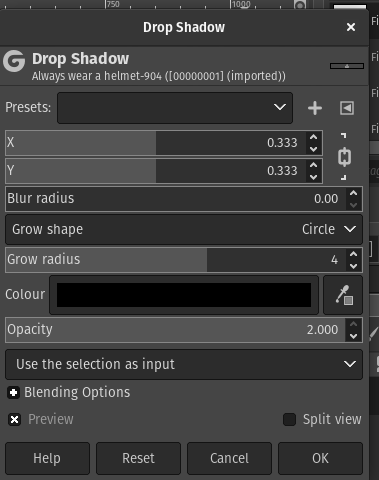
This is slightly less intuitive in GIMP, but once you understand the process, it becomes quite easy. First of all, go to Filters → Light and Shadow → Drop Shadow….
Copy the settings below for an outline effect. The Grow radius option affects the outlines thickness, so adjust this to your preference. Once you're happy, click OK.
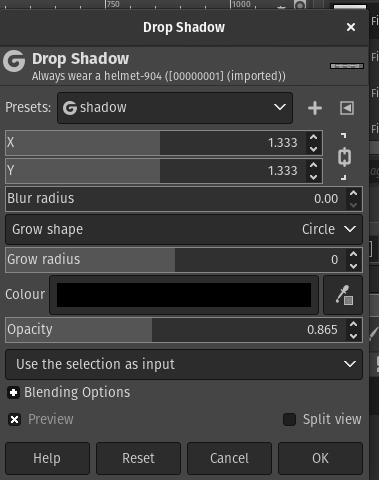
Next, we're going to do the same thing again, but this time we're going to add an actual drop shadow. So go to Filters → Light and Shadow → Drop Shadow… again.
Copy the settings below for a drop shadow effect. Again, have a play with the settings until youre happy with the result, then click OK. You can add these settings as named presets so that you do not have to manually input them every single time, and so that all your gifs have a uniform caption style.
As it stands, your text is a separate frame in the gif, since GIMP makes no distinction between layers and frames. We could manually copy and paste and merge the text frame with each frame, but I'm often working with gifs that have between 100 and 200 frames, and I flat out refuse to waste so much time on such a tedious task. Which is why God invented AnimStack.
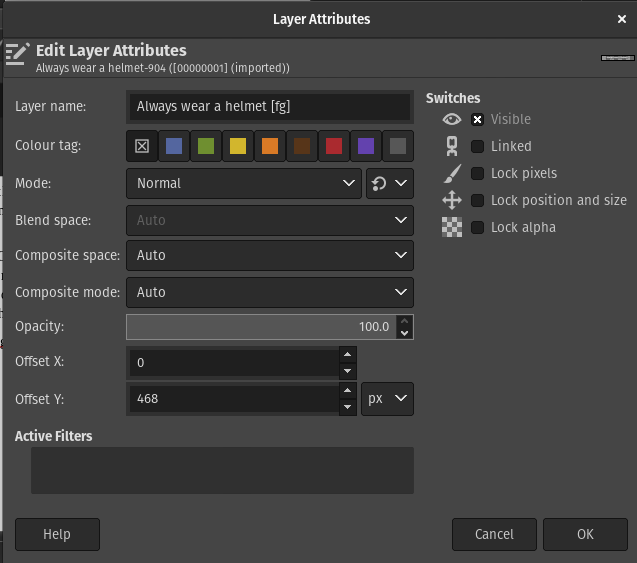
So, double click on your text layer's thumbnail, and add [fg] to the Layer name, like this:
Finally, go to Filters → Animation → Process AnimStack tags and wait for AnimStack to do it's thing! It may take up to a minute, but you'll know it's done when the layers stop moving around. You can go to Filters → Animation → Playback... to view your gif with it's caption.
5: Export to gif webp
My secret is that I personally prefer to use webp format. It just looks smoother, and less compressed on Tumblr. You are welcome to export to gif to your own desire, and experiment with the settings. The process is the same, anyway.
Go to File → Export As... and navigate to the directory you want to save the file. Change the filename to mygif.webp, though of course you can change the mygif part to whatever you want!
When you click Export, a new window will appear. Check As Animation, enter 50 into the Delay between frames textbox (I prefer a slower gif, but you may find a different value works better for you), and check Use delay entered above for all frames. Then, click Export and wait for your file to be exported.
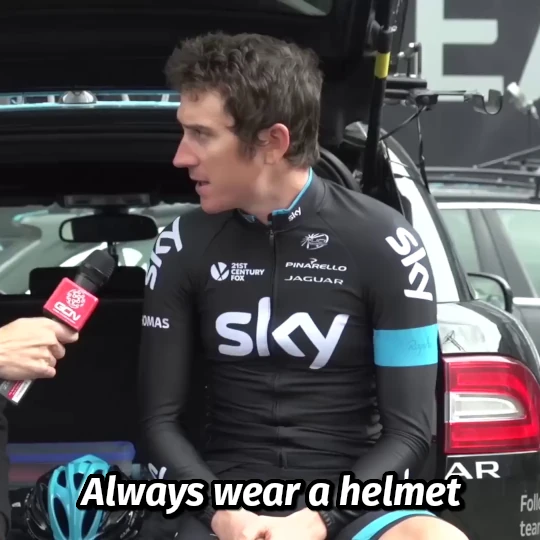
When it is done, you will have a gif webp! Now, go forth and post it to Tumblr, or upload it to your website. Whatever you want to do with it. Finally, here's some very sound advice from Geraint Thomas;